> ## Documentation Index
> Fetch the complete documentation index at: https://docs.gately.ai/llms.txt
> Use this file to discover all available pages before exploring further.
# Top Up Credits
> Learn how to add credits to your Gately AI account
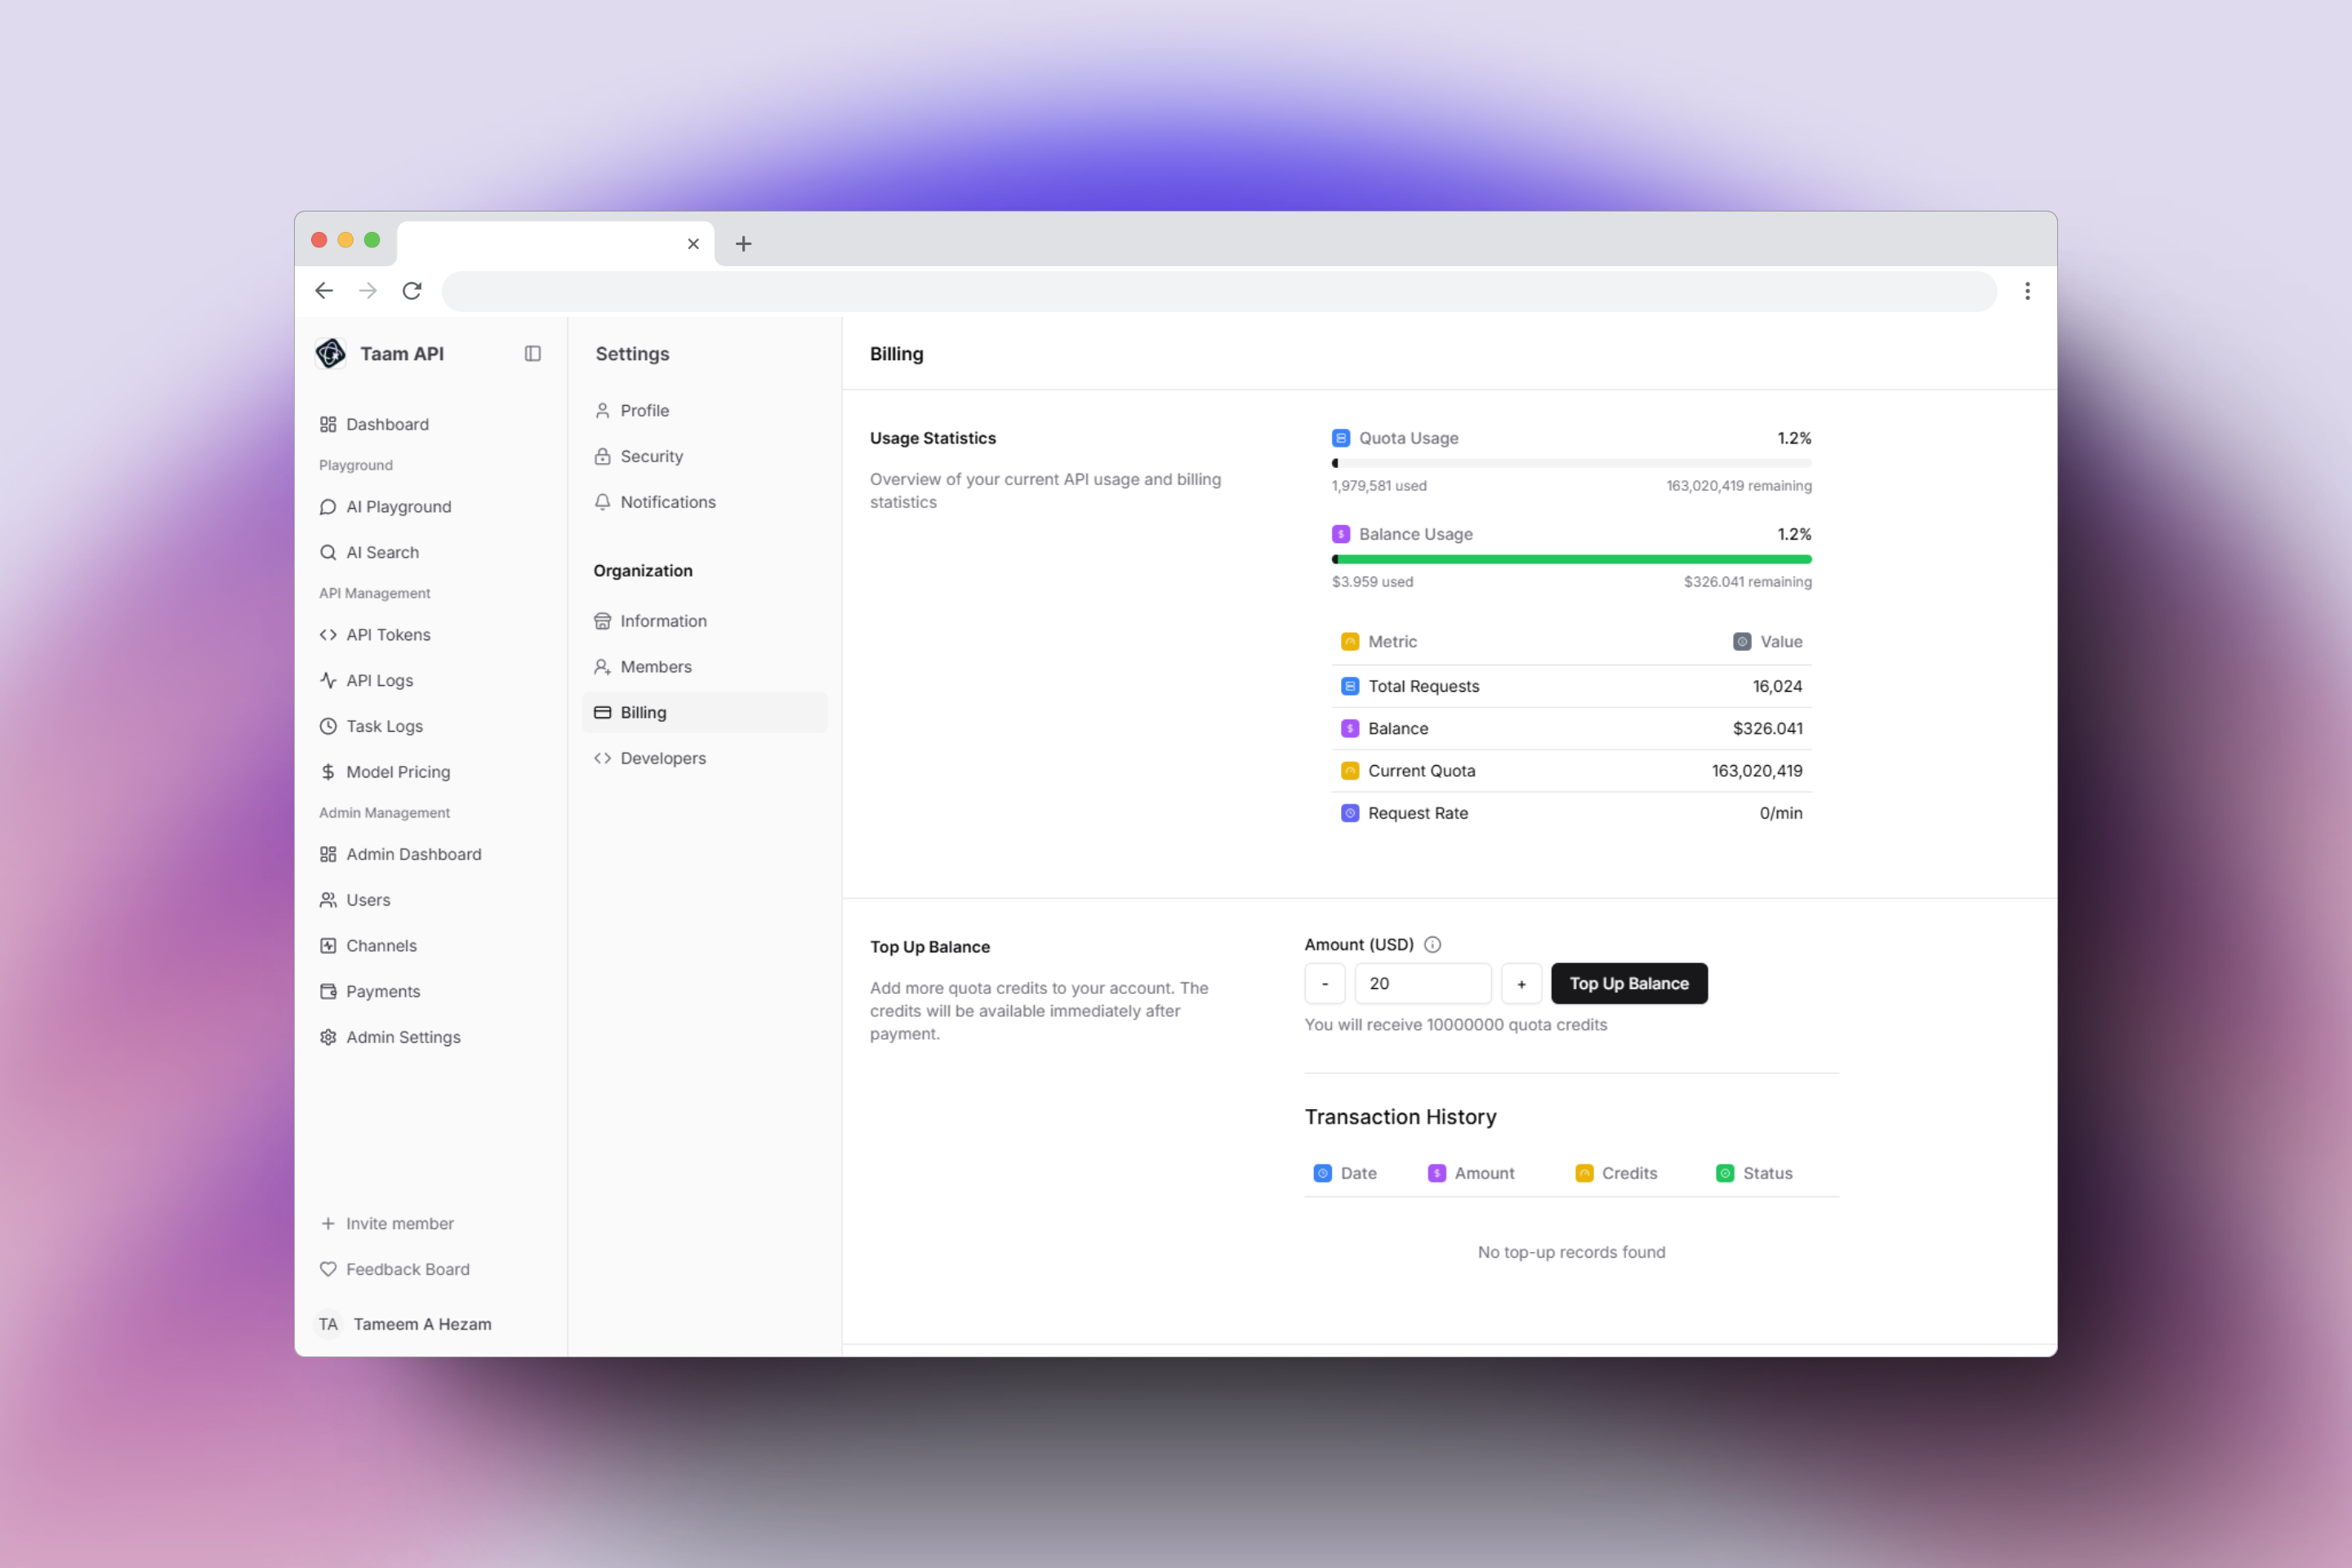 ## Adding Credits to Your Account
Follow these step-by-step instructions to top up your Gately AI account balance:
1. Open your browser and go to [https://app.gately.ai/dashboard/home](https://app.gately.ai/dashboard/home)
2. Ensure you're logged into your account
1. Look for your account icon in the top navigation bar
2. Click on the Account dropdown menu
3. A menu with various options will appear
## Adding Credits to Your Account
Follow these step-by-step instructions to top up your Gately AI account balance:
1. Open your browser and go to [https://app.gately.ai/dashboard/home](https://app.gately.ai/dashboard/home)
2. Ensure you're logged into your account
1. Look for your account icon in the top navigation bar
2. Click on the Account dropdown menu
3. A menu with various options will appear
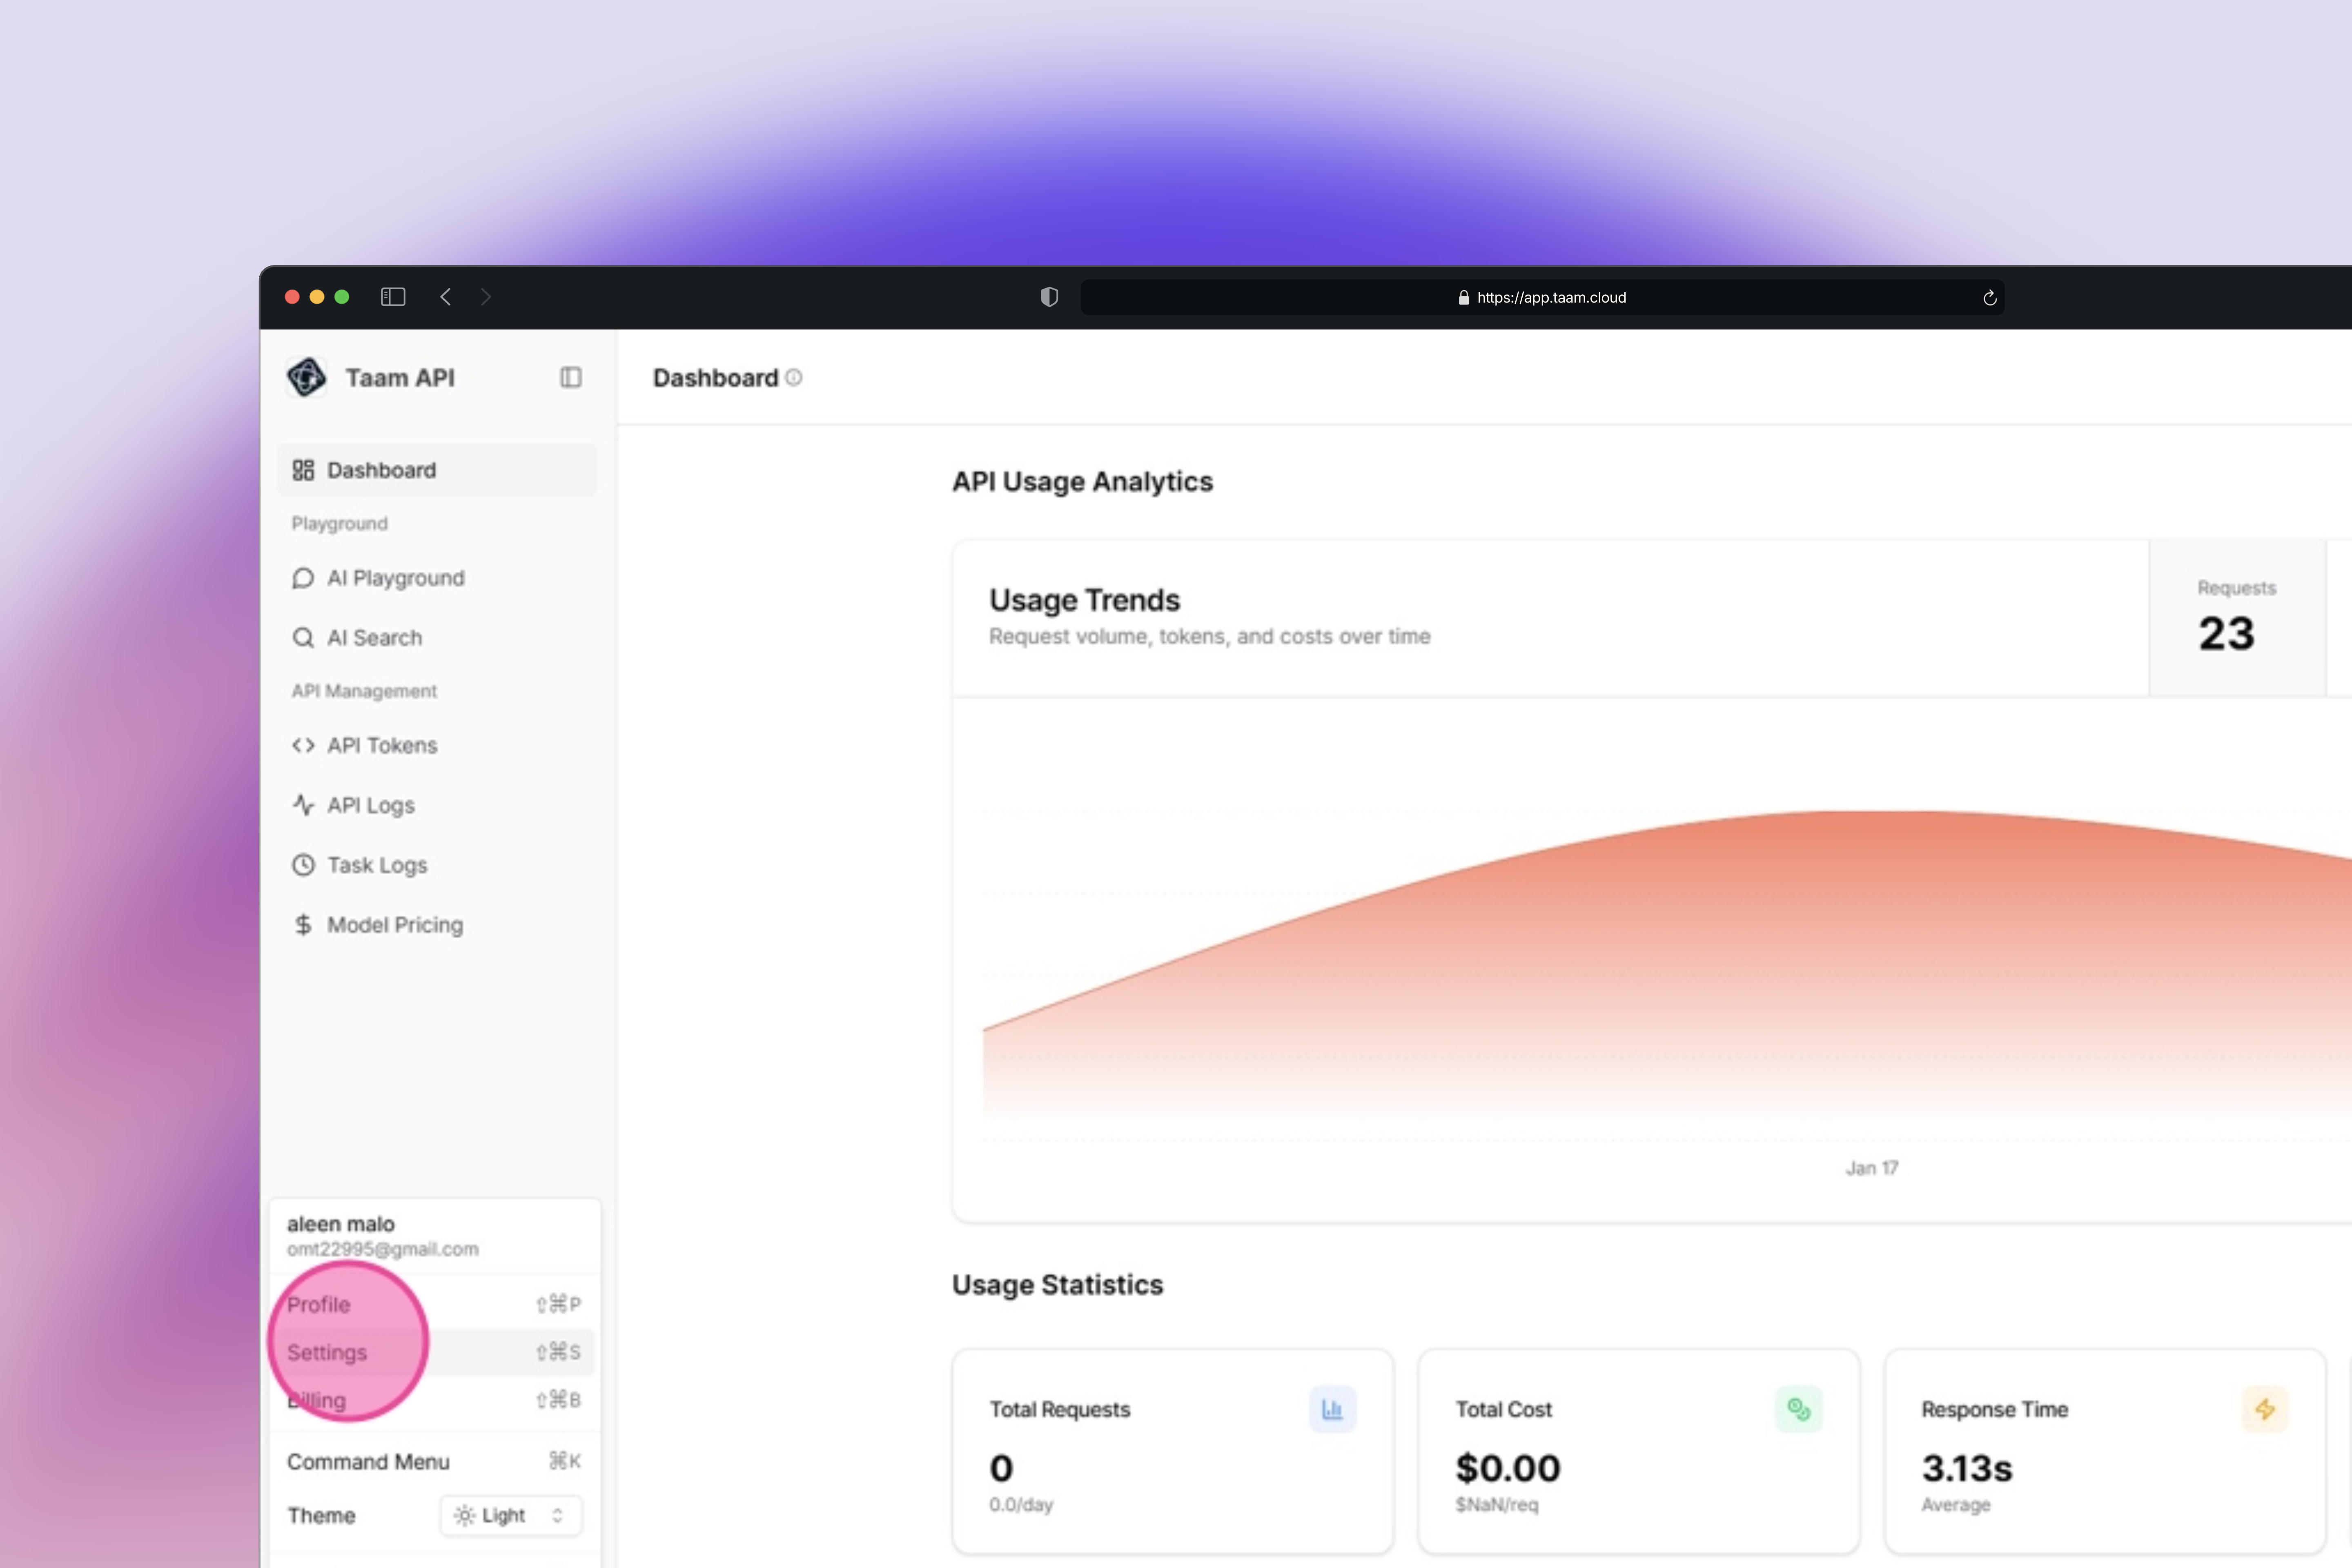 1. In the Account dropdown menu
2. Click on "Settings"
3. This will take you to the account settings page
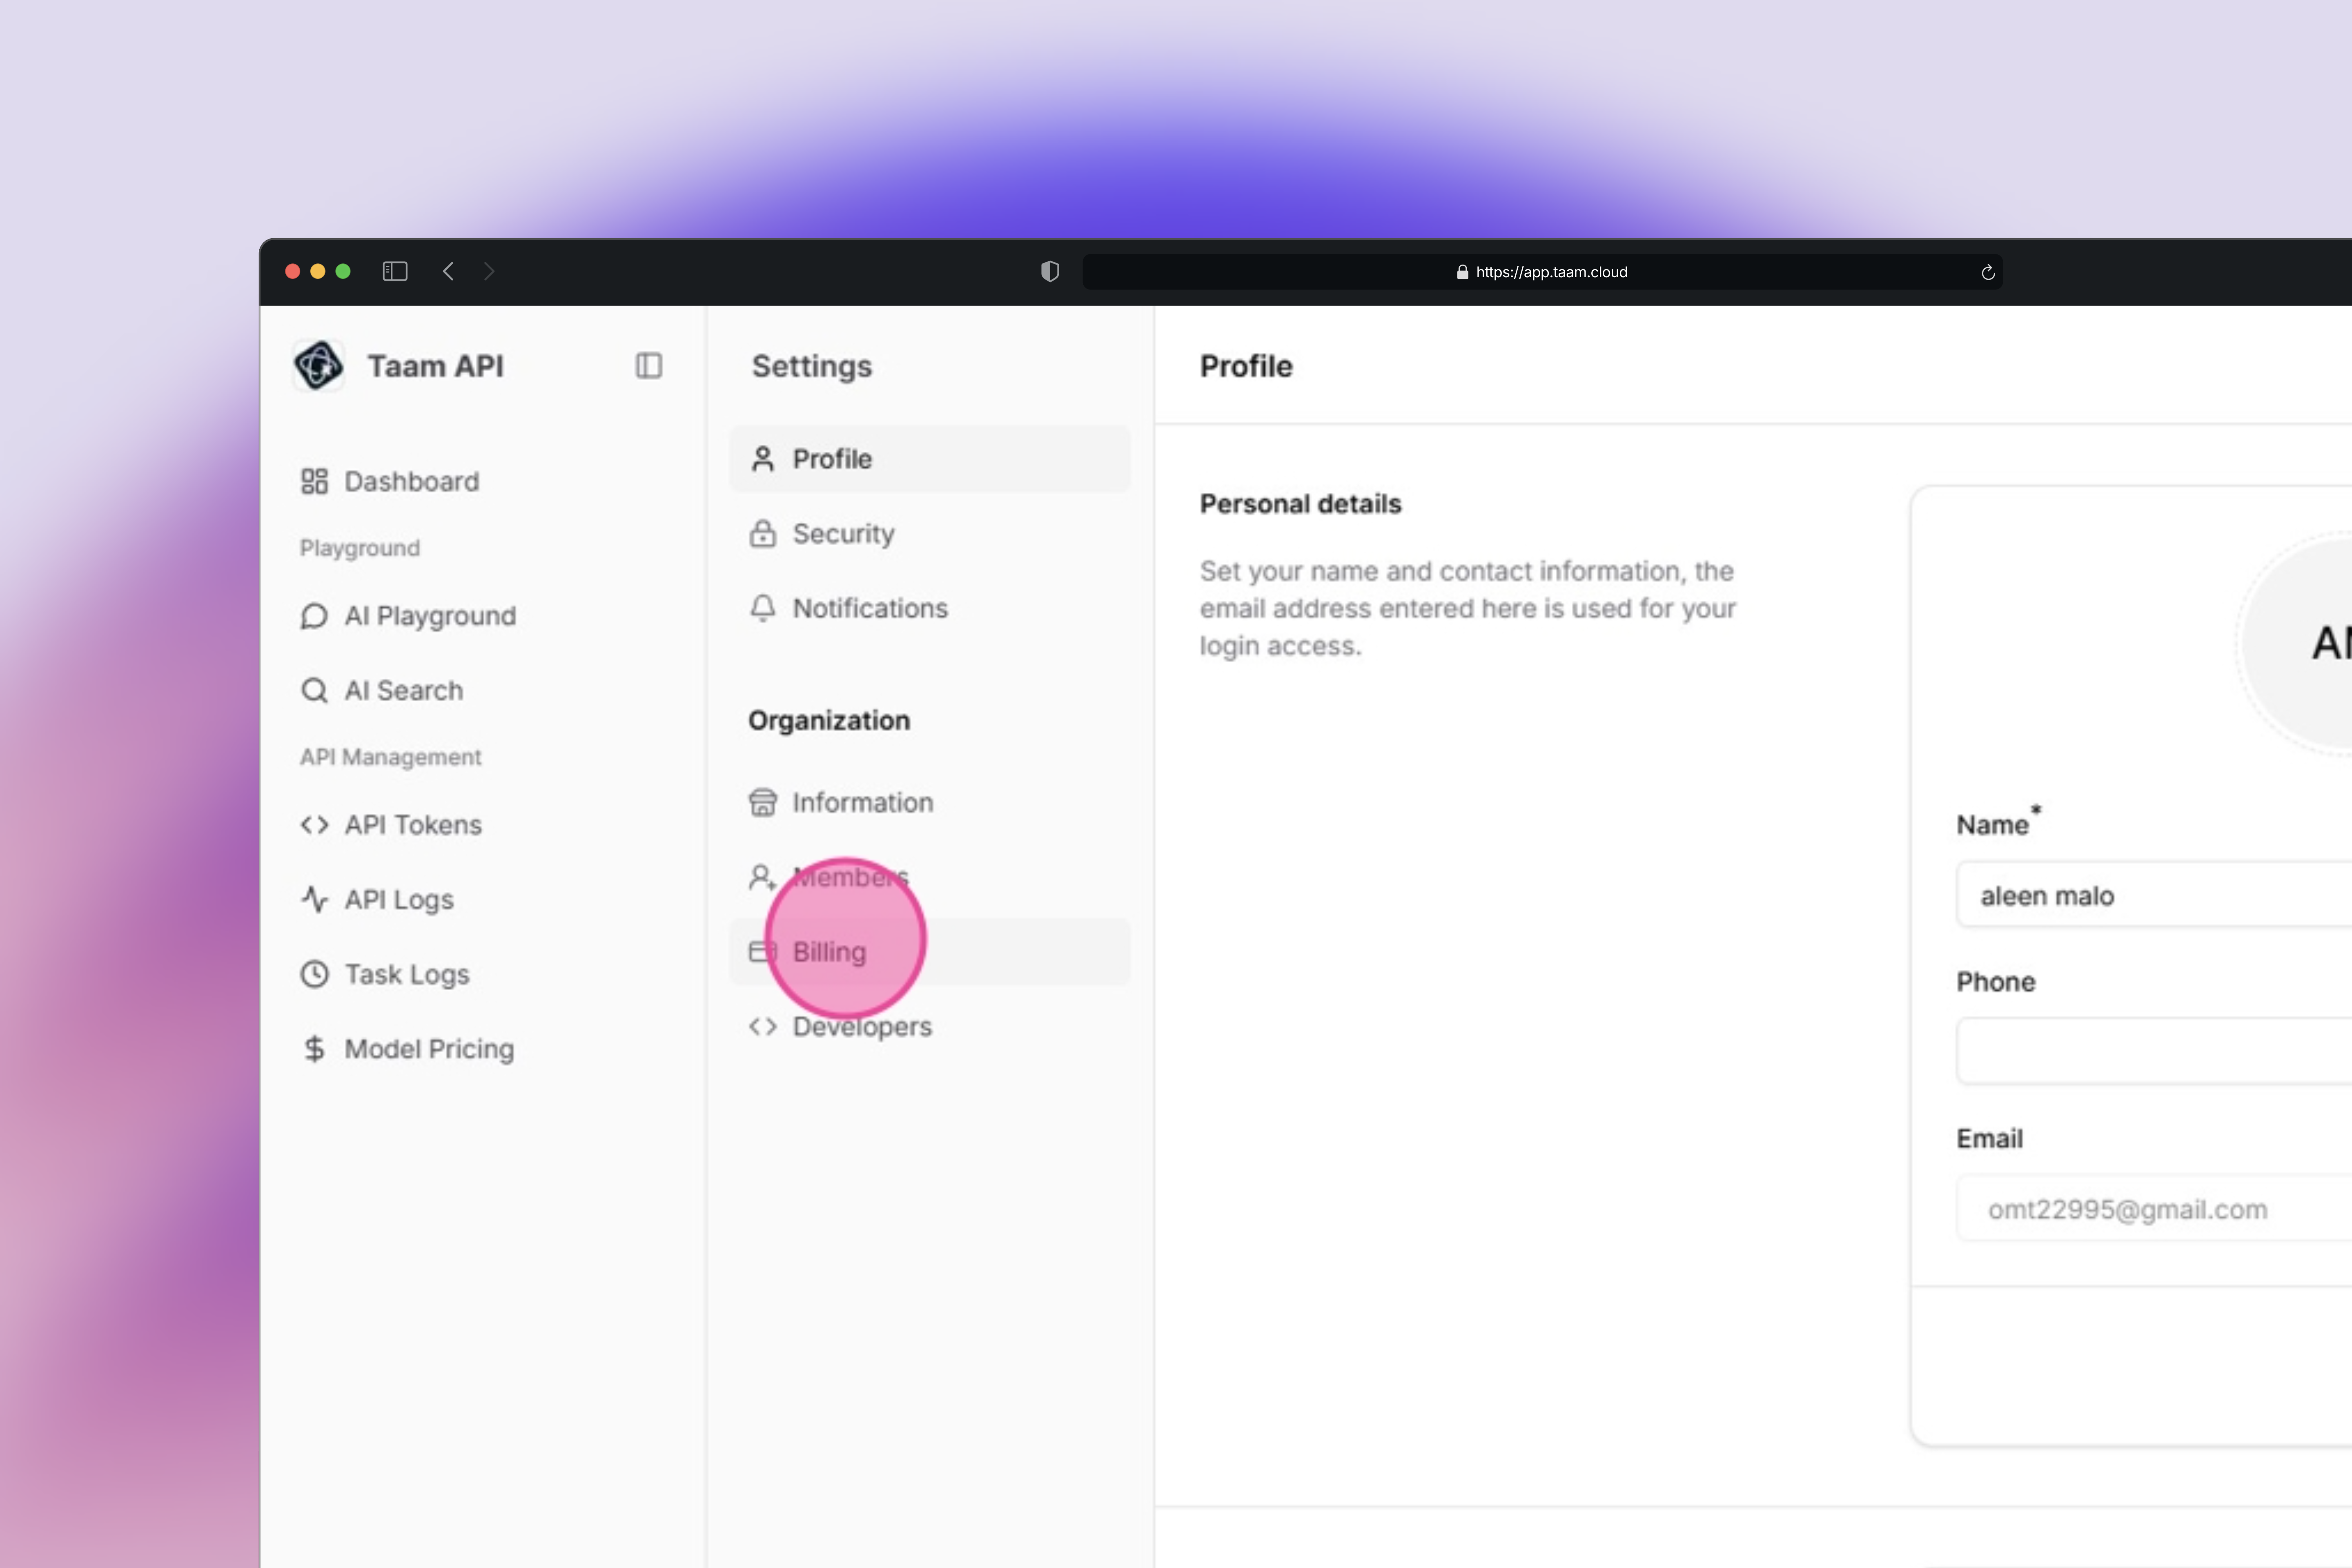
1. In the Settings section
2. Locate and click on the "Billing" tab
3. This tab contains all payment-related options
1. In the Account dropdown menu
2. Click on "Settings"
3. This will take you to the account settings page
1. In the Settings section
2. Locate and click on the "Billing" tab
3. This tab contains all payment-related options
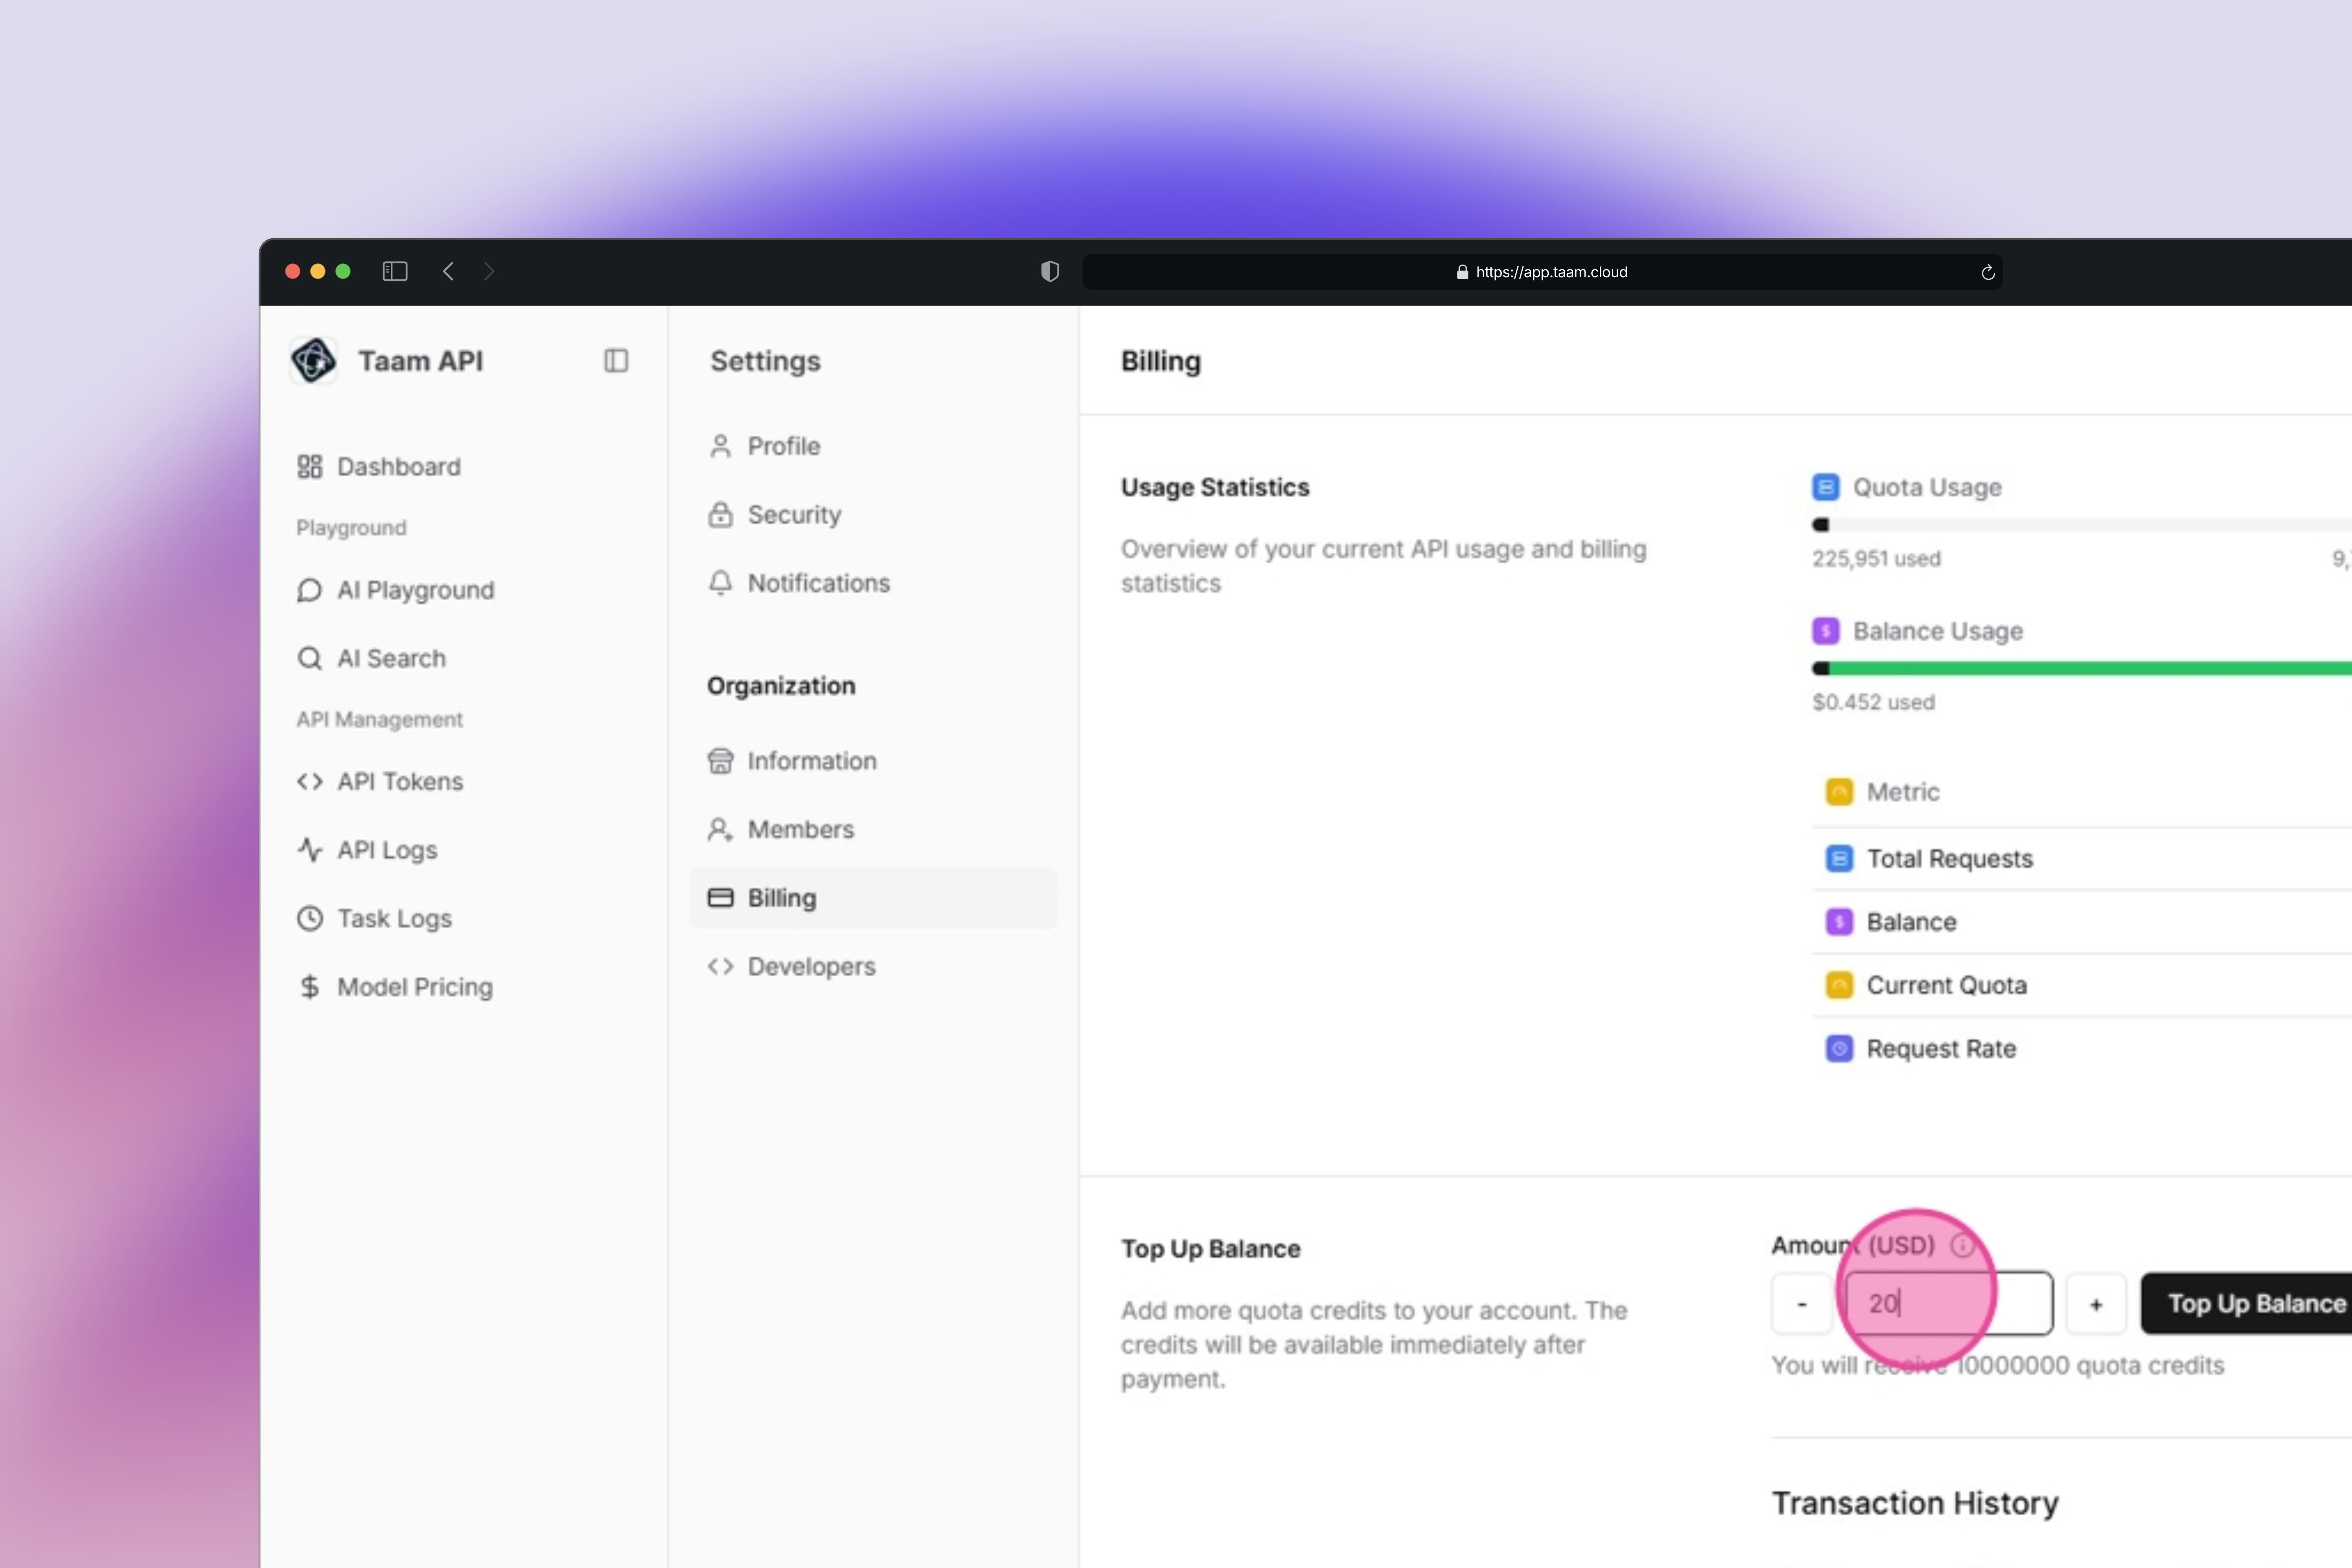
 1. Find the "Amount (USD)" input field
2. Enter your desired top-up amount
3. The minimum amount is \$10 USD
1. Find the "Amount (USD)" input field
2. Enter your desired top-up amount
3. The minimum amount is \$10 USD
 1. Review the entered amount
2. Click the "Checkout" button
3. You'll be directed to the payment processing page
1. Review the entered amount
2. Click the "Checkout" button
3. You'll be directed to the payment processing page
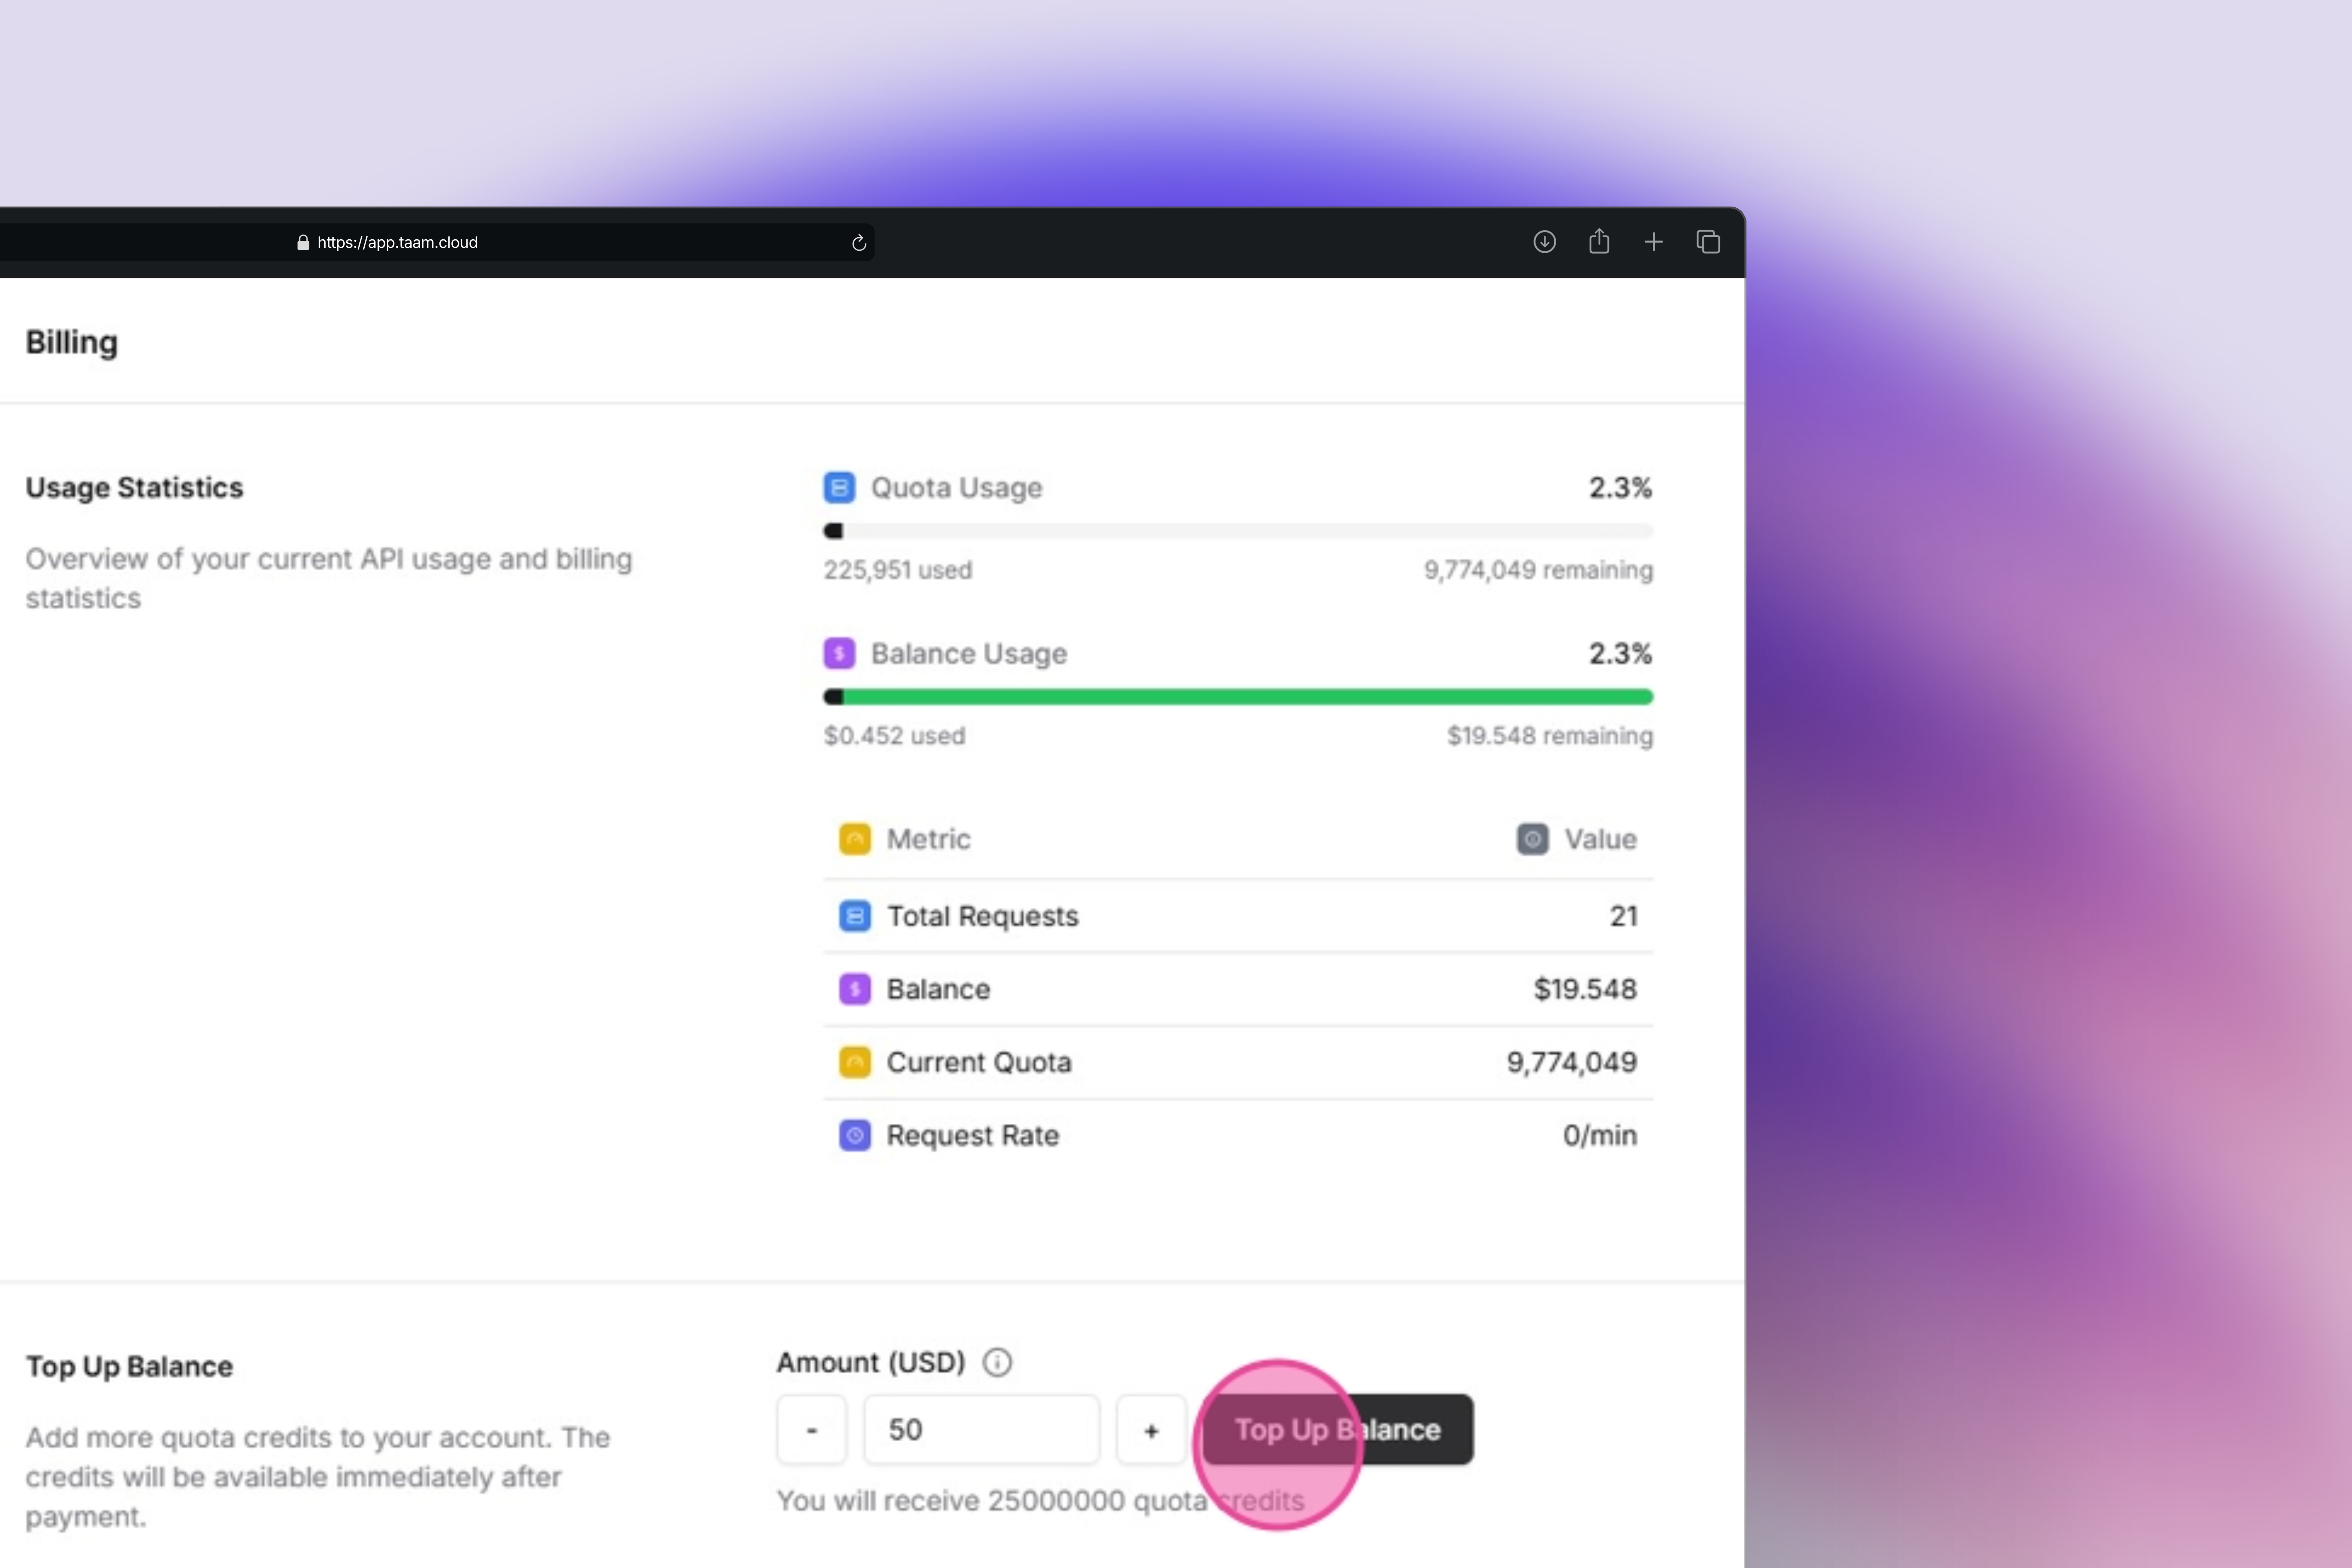 1. Click "Top Up Balance"
2. Select your payment method
3. Enter payment details
4. Confirm the transaction
1. Wait for the success confirmation
2. Check your updated balance in the Billing tab
3. Transaction history will show your recent top-up
Your credit balance updates immediately after successful payment processing. The minimum top-up amount is \$10 USD.
Keep track of your credit usage and consider enabling auto-reload to prevent service interruptions.
Monitor your credit consumption across different models
Having payment issues? Contact our billing support team
1. Click "Top Up Balance"
2. Select your payment method
3. Enter payment details
4. Confirm the transaction
1. Wait for the success confirmation
2. Check your updated balance in the Billing tab
3. Transaction history will show your recent top-up
Your credit balance updates immediately after successful payment processing. The minimum top-up amount is \$10 USD.
Keep track of your credit usage and consider enabling auto-reload to prevent service interruptions.
Monitor your credit consumption across different models
Having payment issues? Contact our billing support team